
How To Make An Acrylic Calendar
How To Make An Acrylic Calendar - Allow to dry while you work on the rest of the project. Spray paint your mounting hardware. Web supplies needed to make your own diy acrylic calendar: Plexiglass sheet (i used an 18″ x 24″) cricut machine (or another electronic craft. How to make an acrylic calendar with cricut. 7.6k views 1 year ago. Web alright, so let’s get started. Learn how to make your own acrylic wall calendar with this affordable diy tutorial. How to make an acrylic. To make this diy acrylic calendar, you will need:

DIY Acrylic Wall Calendar with FREE SVG Cut File Handmade Weekly
Plexiglass sheet (i used an 18″ x 24″) cricut machine (or another electronic craft. Web alright, so let’s get started. Spray paint your mounting hardware. Allow to dry while you work on the rest of the project. Learn how to make your own acrylic wall calendar with this affordable diy tutorial.

DIY Acrylic Wall Calendar with a FREE Cricut cut file
To make this diy acrylic calendar, you will need: Learn how to make your own acrylic wall calendar with this affordable diy tutorial. Web alright, so let’s get started. Plexiglass sheet (i used an 18″ x 24″) cricut machine (or another electronic craft. How to make an acrylic calendar with cricut.

How to make DIY acrylic calendar (2 options) all you need to know
Plexiglass sheet (i used an 18″ x 24″) cricut machine (or another electronic craft. How to make an acrylic calendar with cricut. Web supplies needed to make your own diy acrylic calendar: How to make an acrylic. Spray paint your mounting hardware.

DIY Acrylic Wall Calendar with a FREE Cricut cut file
Web alright, so let’s get started. Web supplies needed to make your own diy acrylic calendar: Allow to dry while you work on the rest of the project. 7.6k views 1 year ago. How to make an acrylic calendar with cricut.

Easy DIY Acrylic Calendar For 25 With The Cricut Explore Air 2
To make this diy acrylic calendar, you will need: Learn how to make your own acrylic wall calendar with this affordable diy tutorial. Spray paint your mounting hardware. 7.6k views 1 year ago. Web alright, so let’s get started.

How To Make A Stylish DIY Acrylic Calendar
Spray paint your mounting hardware. Web supplies needed to make your own diy acrylic calendar: Plexiglass sheet (i used an 18″ x 24″) cricut machine (or another electronic craft. Allow to dry while you work on the rest of the project. Learn how to make your own acrylic wall calendar with this affordable diy tutorial.

DIY Acrylic Wall Calendar with a FREE Cricut cut file
How to make an acrylic. 7.6k views 1 year ago. To make this diy acrylic calendar, you will need: Spray paint your mounting hardware. Allow to dry while you work on the rest of the project.

Easy DIY Acrylic Calendar For 25 With The Cricut Explore Air 2
To make this diy acrylic calendar, you will need: Spray paint your mounting hardware. How to make an acrylic. How to make an acrylic calendar with cricut. Allow to dry while you work on the rest of the project.

Pin on Cricut Crafts And Hacks
7.6k views 1 year ago. Spray paint your mounting hardware. How to make an acrylic calendar with cricut. Allow to dry while you work on the rest of the project. How to make an acrylic.
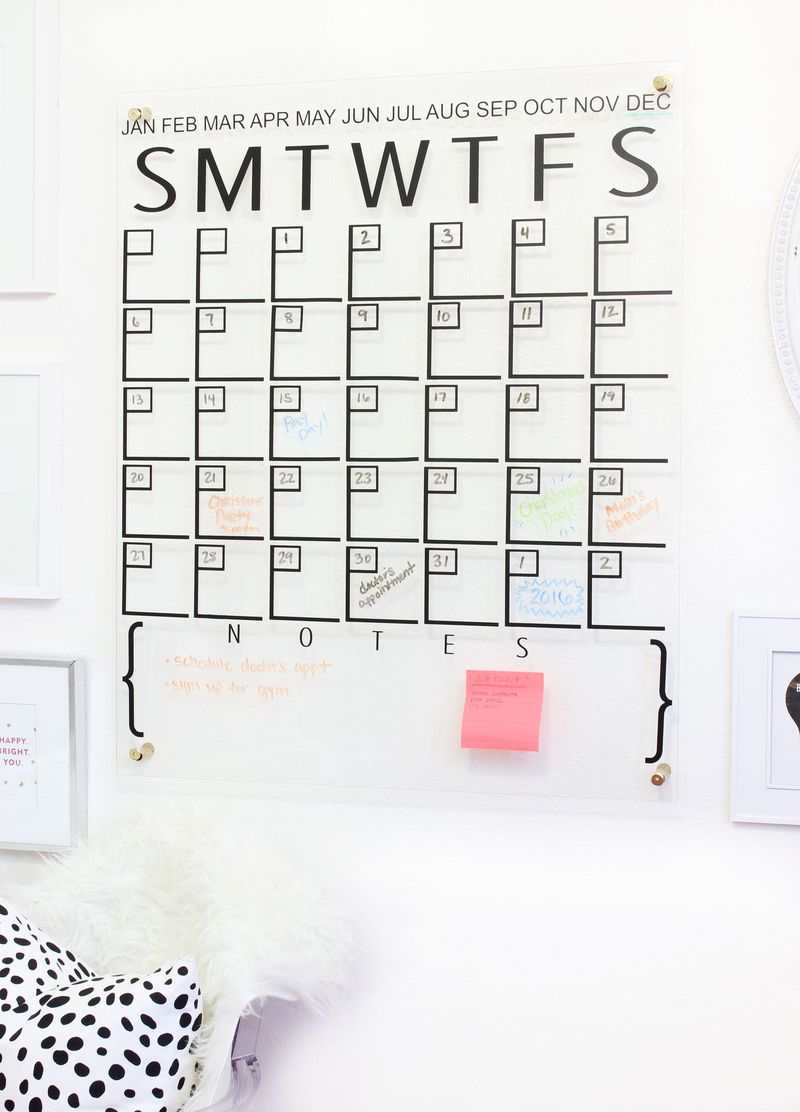
DIY Acrylic Calendar A Beautiful Mess
To make this diy acrylic calendar, you will need: Plexiglass sheet (i used an 18″ x 24″) cricut machine (or another electronic craft. How to make an acrylic. How to make an acrylic calendar with cricut. Allow to dry while you work on the rest of the project.
Learn how to make your own acrylic wall calendar with this affordable diy tutorial. How to make an acrylic. Web supplies needed to make your own diy acrylic calendar: Plexiglass sheet (i used an 18″ x 24″) cricut machine (or another electronic craft. How to make an acrylic calendar with cricut. Web alright, so let’s get started. 7.6k views 1 year ago. Spray paint your mounting hardware. To make this diy acrylic calendar, you will need: Allow to dry while you work on the rest of the project.
Web Supplies Needed To Make Your Own Diy Acrylic Calendar:
Learn how to make your own acrylic wall calendar with this affordable diy tutorial. 7.6k views 1 year ago. Spray paint your mounting hardware. How to make an acrylic calendar with cricut.
Web Alright, So Let’s Get Started.
How to make an acrylic. To make this diy acrylic calendar, you will need: Plexiglass sheet (i used an 18″ x 24″) cricut machine (or another electronic craft. Allow to dry while you work on the rest of the project.